A companion to Indie Innovators, a special section on groundbreaking presses and magazines. Don't miss our video demonstration of how to Coptic bind a chapbook.

1. Choose your covers—postcards (sets of two glued back to back), old book covers, heavy card stock—and punch holes with an awl (purchased at hardware stores for about eight dollars) about a quarter inch from the left edge: one near the top, one near the bottom, and about three in between; they need not be equidistant (fig. A).
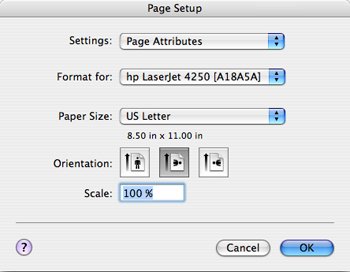
2. To format your book in Microsoft Word for standard postcard size, open a New Blank Document (under the File menu). Go to File > Page Setup and choose the landscape orientation; click OK (fig. B).
3. Create thirty-six pages by inserting page breaks (Insert > Break > Page Break).
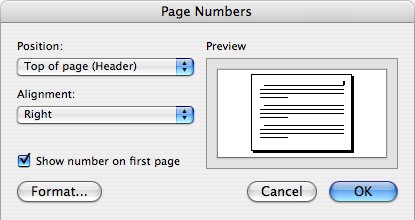
4. Go to Insert > Page Numbers… and select Top of page (Header) and Right alignment (fig. C). (These page numbers will be trimmed off later, but will be useful for printing out your pages.)
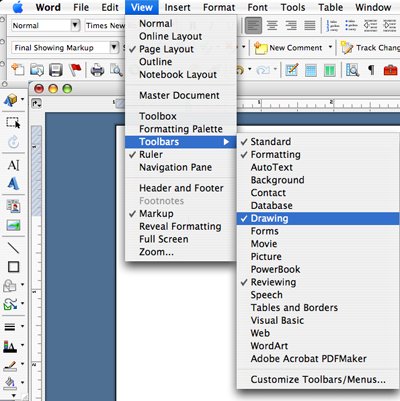
5. Open the Drawing toolbar (View > Toolbars > Drawing) as shown in figure D.
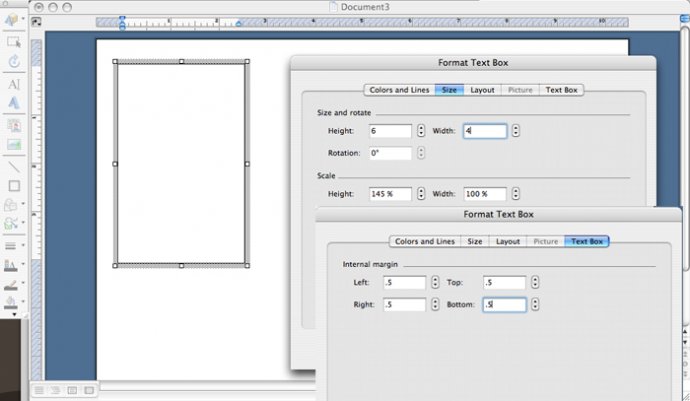
6. Select the
Text Box tool and draw a box on the first page. Double click on any outer edge
of the box, which will open the Format Text Box menu; select the Size tab, set
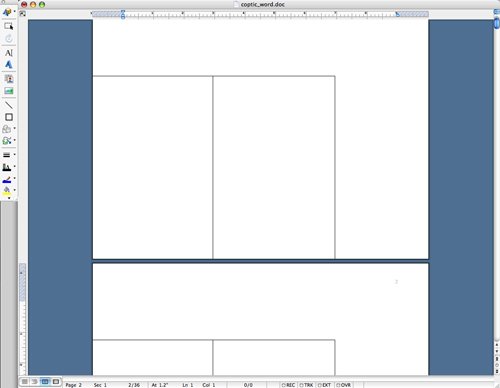
the height and width to 6 x 4 inches. Select the Text Box tab, set all the
margins to .5 inches, and click OK. See figure E.
7. Using the Select Objects tool, drag the box
to the edge of the bottom-left corner of the page. Copy (Edit > Copy) the
box and paste (Edit > Paste) a duplicate outside the first box, then drag
the copy so that it abuts the first box on its right side. Select both boxes by
holding down the Shift key and clicking on each one. Copy and paste the boxes
on each of the following pages (thirty-six in total). See figure F.
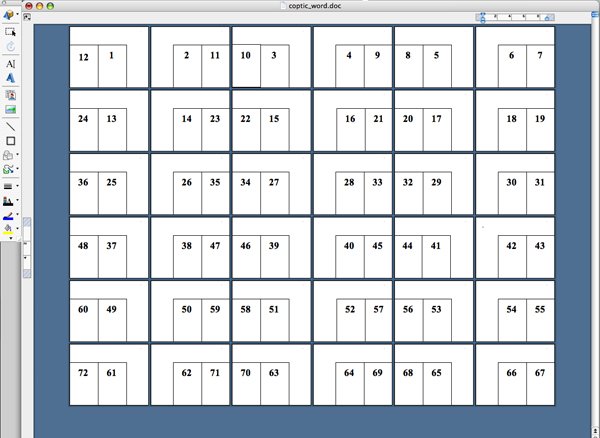
8. The pages of your book will need to be printed double sided, which means the boxes on the even-numbered pages need to appear on the side of the page opposite the ones on the odd-numbered pages. On the even-numbered pages only, select both boxes by holding down the Shift key and clicking on each one. Drag them to the bottom-right corner of the page (fig. G). To set up your pages in the correct number of signatures—the configuration in which your book must be formatted and printed in order for the pages to be consecutive—insert your text in the order shown by placing the cursor in each box.
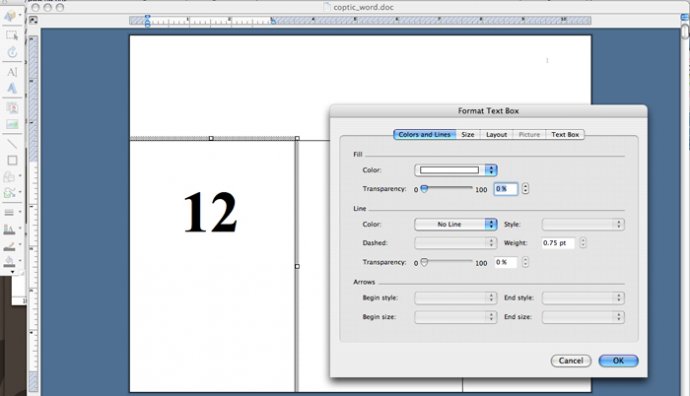
9. Remove the lines around the boxes by holding down Shift and clicking on all the boxes; double click on the outer edge of one of them, which brings up the Format Text Box menu; under the Colors and Lines tab, select Line > Color > No line (fig. H).
10. Printing the pages in the correct order and orientation is tricky and takes patience. First print all the even-numbered pages. Then print the odd-numbered pages on the backsides of the even numbered pages (this is where the page numbers in the headers come in handy). Do this in batches of three—if you make a mistake, it’s less daunting to correct three pages than all thirty-six. Check that your pages will feed through the printer in the correct order and in the correct orientation (page 1 should print on the back of page 2, page 3 on the back of page 4, and so on). After you have them printed correctly, trim off the excess margins so that you’re left with 8 x 6–inch sheets.
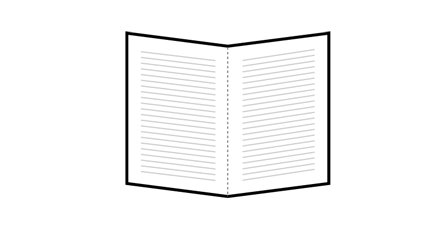
11. Fold all the sheets in half vertically (fig. I).
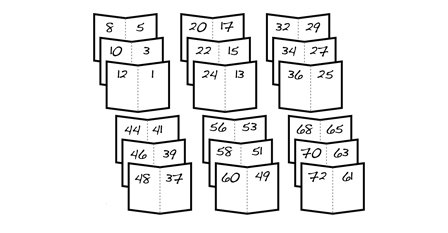
12. Assemble your signatures as shown in figure J (six sets of three pages) and put them under something heavy, such as a stack of books, to press them.
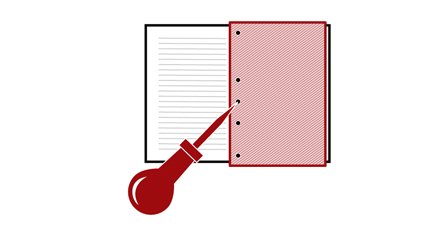
13. Line up the fold of one of the signatures with your cover and lightly mark where the holes should be. Punch with an awl (fig. K). Use a page from this signature as a guide to punch the holes in the other signatures. Fold and press again.
14. Stack your covers and signatures, making sure they’re in the proper orientation and page order. Take a piece of heavy thread (we used cooking twine) and wrap it around the stack lengthwise eight times (the number of signatures plus the covers) to determine the thread’s length. Cut it and thread a needle.
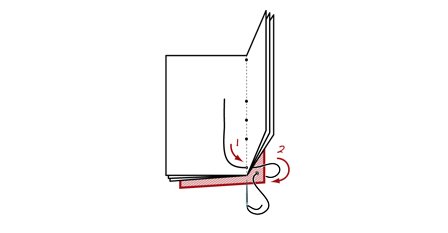
15. Take your cover and the first signature, and begin sewing from inside the fold of the first signature through the bottom hole, leaving a tail of about two inches. Wrap around the cover and sew through the bottom hole (fig. L).
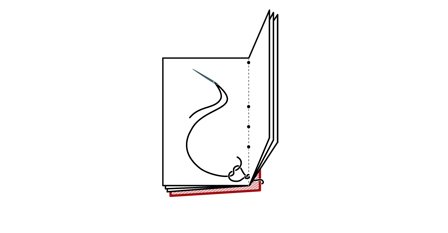
16. Hold the tail inside the signature while you pull the length of the thread through. Thread the needle back through the bottom signature hole. Tie a double knot (fig. M).
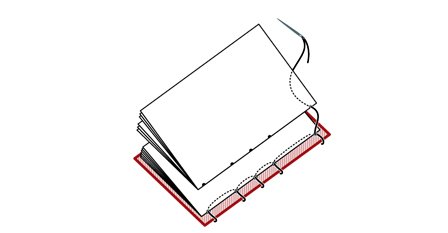
17. Sew through the second hole from inside the signature, as you did the first, and once again wrap around the cover. Sew through the second hole in the cover and then back through the second hole in the signature. Pull the thread through. Repeat this step until you get to the last hole.
18. At the last hole, sew through from the inside of the signature and wrap around the cover and through the hole as before, but instead of sewing back into the signature, connect the second signature, by sewing through its top hole (fig. N).
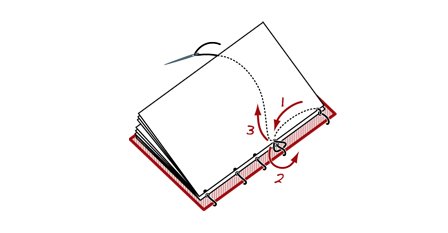
19. Sew down to the second hole and out. Stitch between the first signature and the cover, pushing your needle under the loop of thread, which makes a kettle stitch. Sew back into the hole in the second signature (fig. O). Repeat this step until you get to the last hole.
20. At the last hole, sew outward from the inside of your signature and make a kettle stitch, but do not sew back into the signature. Instead, connect the third signature by sewing into the bottom hole. Sew up to and out through the next hole and then make a kettle stitch between the previous two signatures. Sew all but the last signature this way. A couple of tips: Don’t split the thread by sewing through the middle of a previous stitch, and try to keep the tension even.
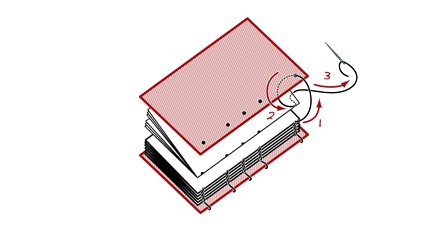
21. Next you’re going to sew the remaining signature and the cover at the same time. Wrap the thread around the signature and the cover and bring the needle through the first hole in the cover. Then push the needle through the hole in the signature (fig. P).
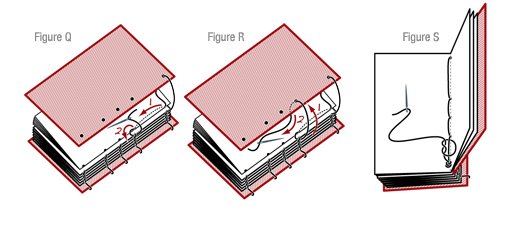
22. Sew outward through the next hole, kettle stitch between the previous two signatures (fig. Q), wrap around the cover and through the cover hole (fig. R), before sewing back into the hole in the signature. Repeat this step for the remaining holes. When you sew through the final hole, tie off as shown in figure S, twice. Trim the stray threads.


